
Air beds are popular because of their adaptability, convenience, and portability. They are great to use for a visiting guest or on your next vacation or camping trip. One of their main drawbacks is their susceptibility to leaks that could develop in the valve or on the fabric. Luckily, these issues can be solved with simple solutions. In the following sections, we will discuss several helpful tips to fix an air bed leak and the products you need to keep your air bed functional and safe.
To fix an air bed leak start by identifying the location of the leak. If the air is leaking from the valve, then replace the valve instead of throwing the air bed away. If the air is leaking from a rip or puncture in the air bed then use a patch repair kit or other household product like duct tape, nail polish, super glue, or marine adhesive to mend the leak.
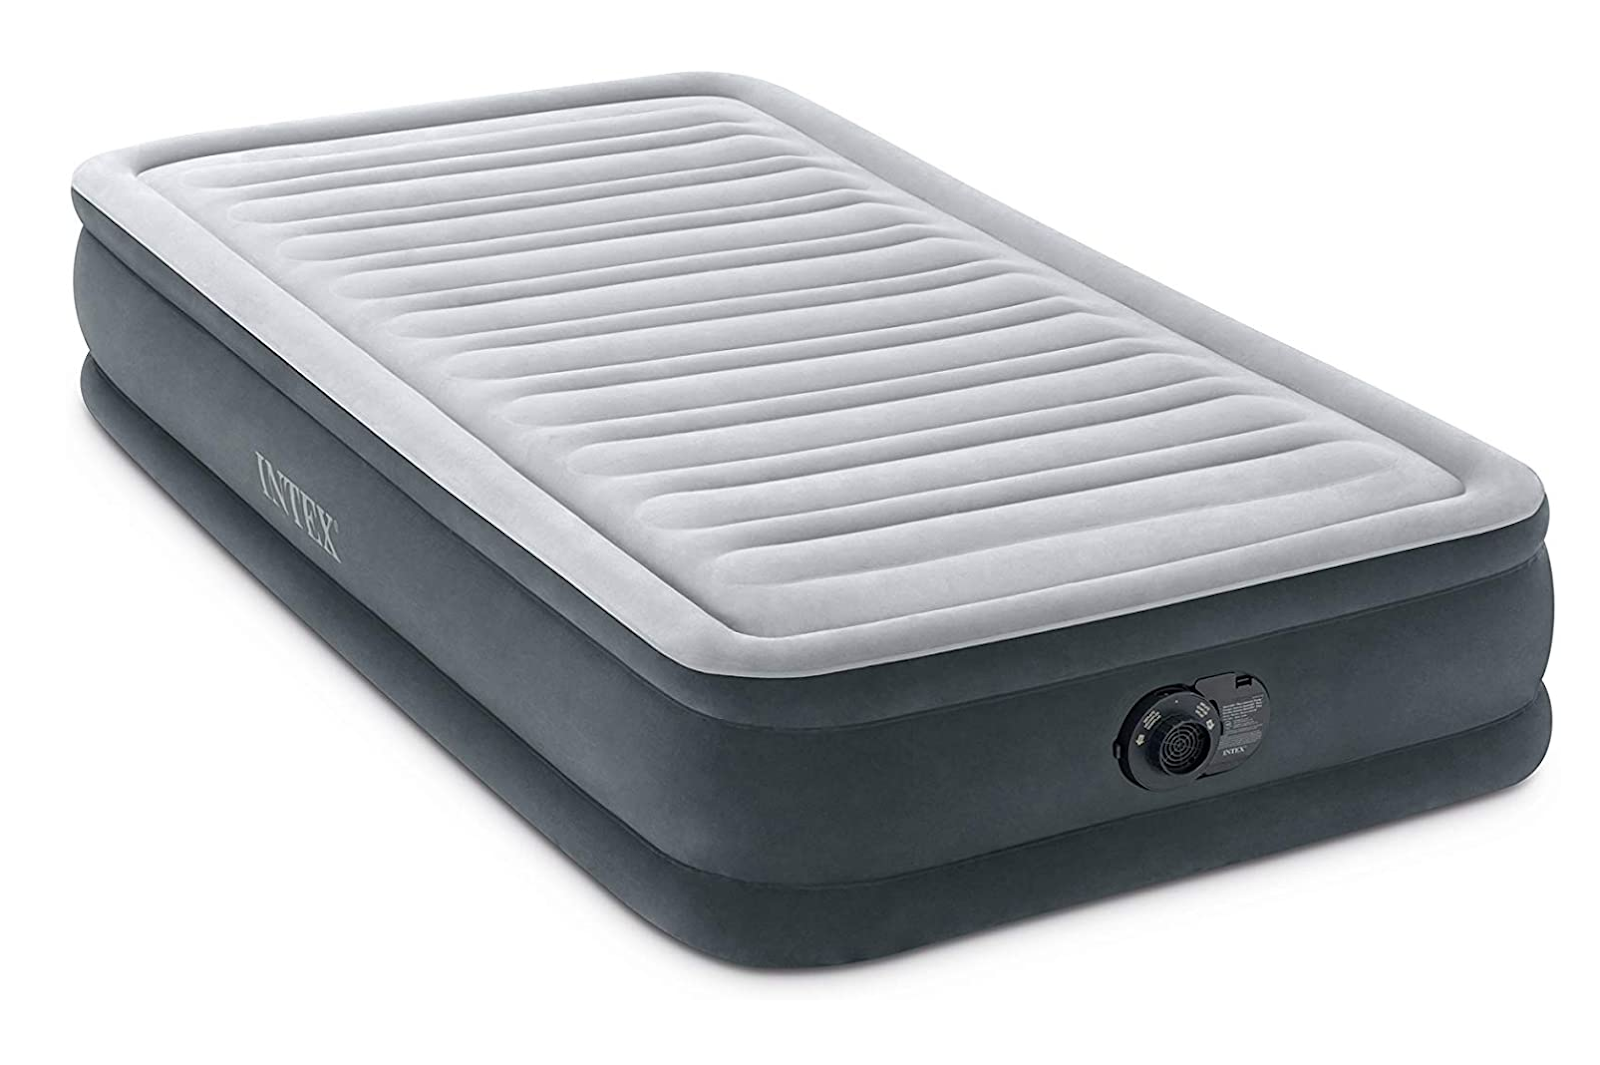 Fixing air bed leaks can extend the number of uses even after a tear. Image Source: Amazon.
How to Check An Air Bed For Leaks
Air leaks can happen without warning. To prevent your air bed from completely deflating, you need to ensure there is enough light and space to perform a repair. You can inspect your air mattress for leaks indoors or outdoors, as long as you can find a quiet place with no wind (or any other) noise that could potentially make the process more difficult. To begin repairing the leak, start by re-inflating the mattress to about 90% capacity. Do this to regain the bed’s shape but don’t over-inflate it or you could potentially make the leak worse. Read our article on how to inflate an air mattress for unique ways to blow up your air bed.
To check an air bed for leaks first find the leak by listening for a hissing sound of air escaping, next gently run your hand along the surface of the mattress to feel for a stream of air escaping through a small puncture or seam, and finally try applying soapy water to the air bed and looking for bubbles at the site of the leak.
For the soap and water method, mix soap and water into a small spray bottle. You will spray this mixture at common points of air leaks such as seams or near the valve. If you see the soap mixture bubbling, it is safe to say the leak is in that area. Mark it with tape so that you can easily locate the spot when you are ready to repair the leak.
 Use soapy water to locate an air bed leak. If bubbles are constantly being generated at one location, you’ve found the leak. Image Source: Youtube.
Did you know that you can replace your air bed’s bladder too? Make sure to check out or related article explaining how to replace an air bed bladder for more information. Also, if you use your air bed on a consistent basis, make sure to read more tips and tricks for air bed long-term use or you might find interest in learning how to lift an air bed for camping. After all, keeping the mattress up off the ground might just keep you from having to fix an air bed leak at all!
How To Fix An Air Mattress Valve Leak
As previously mentioned, the most common locations for leaks are fabric seams or near the valve. Depending on the location of the leak, the repair methods will differ slightly. If your air bed requires a brand specific valve then you will probably get installation instructions with your purchase, like this user manual from Intex.
To fix an air mattress valve leak first check if the plug is correctly inserted into the stem to produce a secure seal, next change the plug if it appears to be worn or broken, and finally replace the valve completely if it is not sealing properly or deteriorated due to age.
Read our article on how to replace an air bed valve for a detailed step-by-step guide. Replacing an air valve is easy to do if you follow the instructions that are supplied by the manufacturer. The following steps are general guidelines on how to fix an air mattress valve leak.
Step 1. Check If the Plug Is Properly Inserted Into the Stem
First check if the plug is properly inserted into the stem. This seems obvious, but it is important to make sure the plug and the stem are not loose or broken. An air bed with a plug and stem seal like this one ensures a leak-proof seal when closed correctly.
If your air bed comes with a dial, make sure your dial—similar to the plug and stem system— is properly fastened and not broken. You need to ensure that the dial is tightened completely.

Step 2. Change the Plug If Necessary
If you have identified the plug as your problem, and it is irreparable, you need to purchase a new plug. Determine the model of your air bed and purchase a plug that fits that model. If you are unsure of the model number of your air bed then measure the diameter of the hole and buy a plug that fits into that size hole. For example this Intex plug replacement from Amazon fits into a hole with 1.68-inch diameter.
Step 3. Replace the Valve Completely
If the plug is not the issue, but the valve is faulty or broken then you must replace it. Most manufacturers provide instructions on how to replace valves and often sell replacements. If your air bed needs a brand specific valve then consult the manual or manufacturer website on what part to buy. This user instruction manual for the Aerobed mattress illustrates the type of valve that is specific to this brand and model, and the replacement valve for the Aerobed is easily found on Amazon.
Some air beds have standard size valves, so replacing them with a universal valve might be a suitable option. The universal valve cover might not be a perfect fit but it can be a good temporary solution. This universal valve replacement will fit most air mattresses.
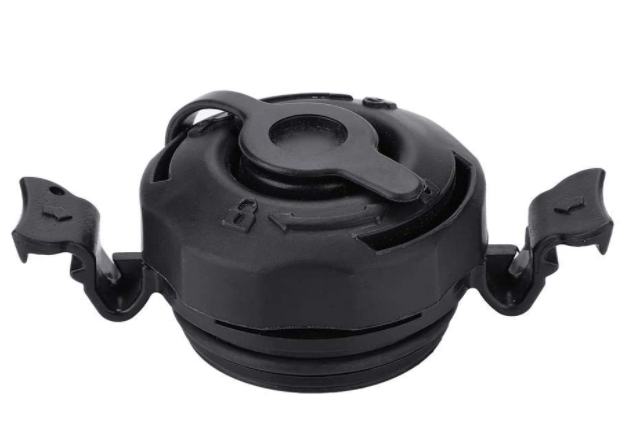 This universal valve cover has a retractable lid to refill air if needed. Image Source: Amazon.
You might also find interest in our related article explaining what to do if your air mattress keeps losing air or deflates overnight as well as our tips to fix an air bed that is cold. So make sure to check those out too.
How to Repair an Air Leak with a Patching Kit
Air beds tend to gradually lose firmness during the night but if your air bed is rapidly losing air and deflating quickly then it probably has a leak. Read our article for more information about why air beds lose air and how to fix this problem. Most air beds come with a small patch repair kit included for emergency repairs. But repair kits are inexpensive and readily available, so buy one and keep it in the air bed storage bag. This PVC repair kit has several different size patches that can be quickly applied the second a tear or puncture appears in your air mattress.
To repair an air leak with a patching kit first deflate and dry the air mattress. Then follow the directions from the patch kit, apply glue, spread it, put the patch on, allow the glue to dry completely before inflating the mattress, and then recheck for leaks.
Step 1. Dry the Water You Used to Find the Leak
If you had decided to use soap and water to find the leak, then make sure you have dried the mattress completely before proceeding. If you have a blow dryer nearby, you can use it on a cool setting to expedite the drying process, or use an ultra absorbent cloth like this one to wipe the mattress dry.
Step 2. Use Some Glue
The repair kit that came with your mattress should contain glue and a patch. Apply the glue around the hole. There is no precise amount of glue you should use because it depends on the size of the hole, but as a general rule it is better to apply a generous amount of glue to ensure a good repair. It is important to cover the entire area where you plan to place the patch.
Step 3. Spread the Glue
Before the glue hardens, spread the glue on the area where you plan to apply the patch. This video tutorial goes through all the steps you need to follow to repair an air mattress.
Step 4. Put the Patch On the Glue/Damaged Area
The next step is to apply the patch to the hole. Make sure to hold the patch down for at least 60 seconds to make sure the glue adheres to it.
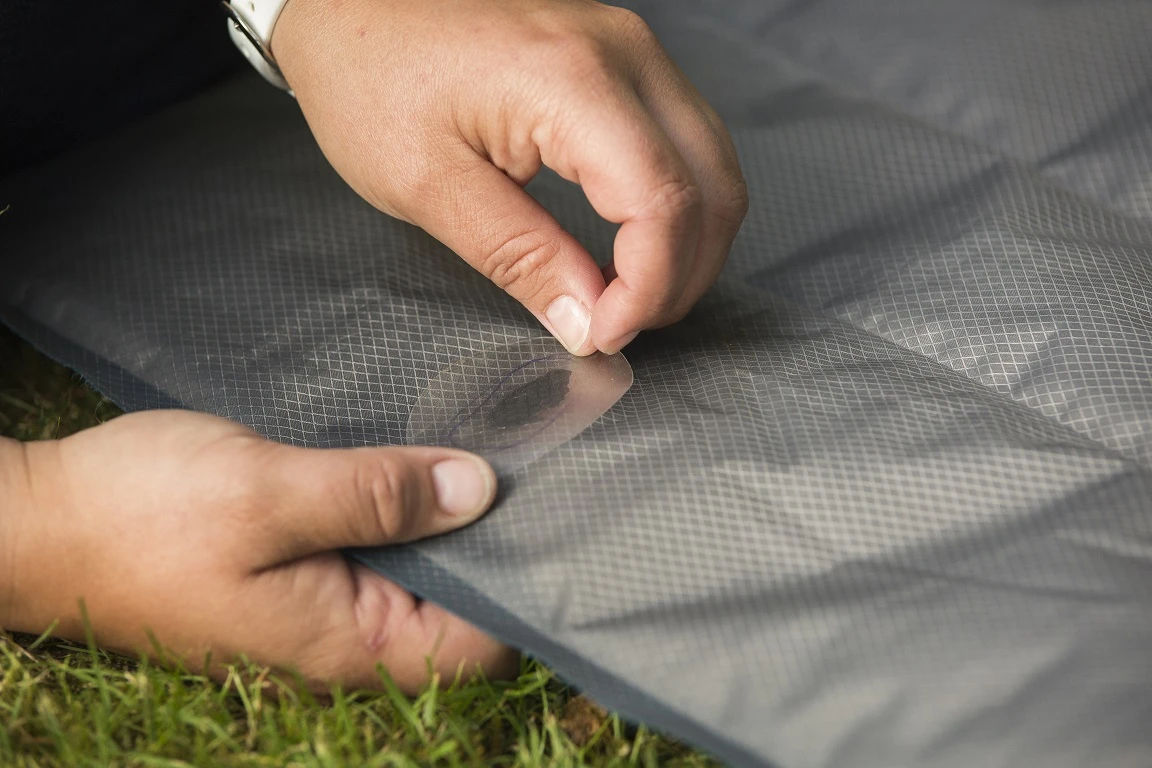 Use a vinyl-adhesive patch to fix an air mattress leak. Alternative solutions like duct tape work temporarily but aren’t long-lasting like a real vinyl patch with vinyl adhesive. Image from Gear Aid.
Step 5. Check the Air Mattress
Allow the glue to dry for about 24 hours so that the patch has properly adhered to the mattress. The last step is to check that the repairs were successful. Re-apply the soap and water mixture over the previously leaky area to see if bubbles form over the patch. If they do, then that means you will need to apply another patch.
You might also want to take a look at our related article explaining what to do if an air bed is not inflating for additional tips and tricks.
Air Bed Repair Kits Available On The Market
If your air bed does not come with a repair kit, there are several options available online.
| Repair Kit | What the kit contains | Price |
| 3 in x 7 ft Roll Tpu Pool Patch Repair Kit for Air Mattress | A high-strength roll of TPU patches that are easy to use because they peel and stick. | ~$15 |
| Tear-air Vinyl Inflatable Repair Kit | TearAid Patch That Cuts Easily With Scissors To Any Size, Reinforcement Filament For Repairing Tears At Edges,and Alcohol Prep Pads. The patch is transparent. | ~$10 |
| Boxer Adhesive | 1 Ounce Tube of adhesive and patching vinyl | ~$10 |
| 3M RT-CL60 Clear Repair Tape 1.88 inch | 1x 20 Yard Roll of flexible and water-resistant adhesive tape | ~$10 |
How To Fix A Hole In An Air Mattress Without A Patch
If you are out camping and your air mattress suddenly develops a leak there are some temporary solutions to repair the leak if you don’t have a repair kit handy.
To fix a hole in an air mattress with a patch use duct tape, nail polish, super glue, or marine adhesive like “Amazing Goop” to temporarily seal the leak.
Method 1. Duct Tape
Covering the hole with duct tape is pretty simple. Cut or rip a piece of duct tape that will be large enough to cover the puncture. Then apply the duct tape over the leak. You should consider this a temporary solution because eventually the tape’s adhesive will deteriorate. This could be a good solution if you are out camping and suddenly have a leak.
Method 2. Nail Polish
You can apply a thin layer of nail polish to the hole. This solution is a little out-of-the-box and only works for really small leaks, but after applying at least 5 layers of nail polish, you should have a functioning seal. Make sure the surface you are applying the nail polish to is completely dry.
You can check if the nail polish was successful by applying soapy water. If bubbles begin to form, you might need to use a different solution to repair your leak.
Method 3. Superglue
If you don’t have a patch, but you have superglue, you can still fix the leak. Apply enough superglue to cover the hole and allow it to dry. After the glue dries, apply another coat to strengthen the repair. Repeat this process until you see that the puncture is completely covered.
This solution will not work for larger leaks where glue can’t spread across to join the edges of the hole.
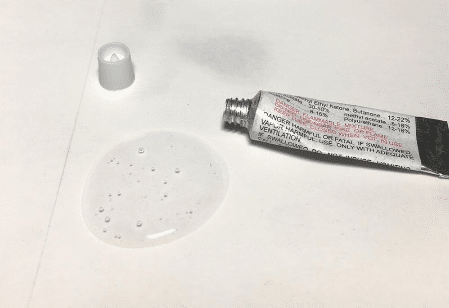 Using super glue to cover up small holes works well. Image from Youtube.
Method 4. Marine/Amazing Goop
Marine adhesive,—also known as “Amazing” Goop—is a type of strong adhesive that can also seal leaks. Marine Goop is available on Amazon and is completely water and UV resistant, so it would make a good temporary repair to both air beds and waterbeds. If you are interested in the similarities and differences between air beds and water beds, then have a look at our article for more information.
To apply the Goop, start by gently sanding the surface and degreasing it. After that, apply a thin layer and cover the leak. Lastly, let the sealant dry for at least one day before inflating the air mattress.
Related Articles:
How to choose an air bed that holds 400 pounds or more
Key Takeaways
- Identifying Leak Source: Start by identifying the source of the leak either by listening for a hissing sound, feeling for a stream of air, or applying soapy water to look for bubbles at the site of the leak.
- Fixing Valve Leaks: For valve leaks, ensure the plug is correctly inserted, replace the plug if worn or broken, or replace the entire valve if needed, following manufacturer instructions or opting for a universal valve replacement if suitable.
- Utilizing Patching Kits: Use a patch repair kit to fix fabric leaks by deflating and drying the air bed, applying glue, spreading it, placing the patch, allowing it to dry, and rechecking for leaks.
- Alternative Leak Repair Methods: In the absence of a patching kit, temporary solutions include using duct tape, nail polish, super glue, or marine adhesive to seal small leaks.
- Additional Repair Resources: Various air bed repair kits are available in the market with different pricing and contents, providing an easy fix to common air bed leak issues.
- Preventive Measures: Preventing leaks by keeping the air bed off the ground during camping or by replacing deteriorated parts like bladders and valves can help in prolonging the air bed’s usability.